400 mm telescope building |
available in multiple languages : |
 |
 |
|
Making the secondary cage
The design of the ring supporting the secondary mirror and the focuser was simplified at maximum :
- Single ring design, to limit weight and size.
- Octogonal structure for stiffness
- Standard "spider" design with 4 vanes
On the design side, ther are 2 critical elements to look after :
- The internal diameter of the ring, which also acts as a baffle for the incoming light rays. I took a standard value of 460 mm which is widely used for 400 F/D 4,5 instruments, giving a full illumination of the primary mirror with an incident light up to 1°, which is more than enough for wide field use...
- The secondary mirror cell, which must allow a perfect alignment of the mirror. If I include the ability to play with bolts tightening the spider vanes, I can reach 6 degrees of freedom on the secondary mirror, ensuring it can be placed correctly in the optical path.
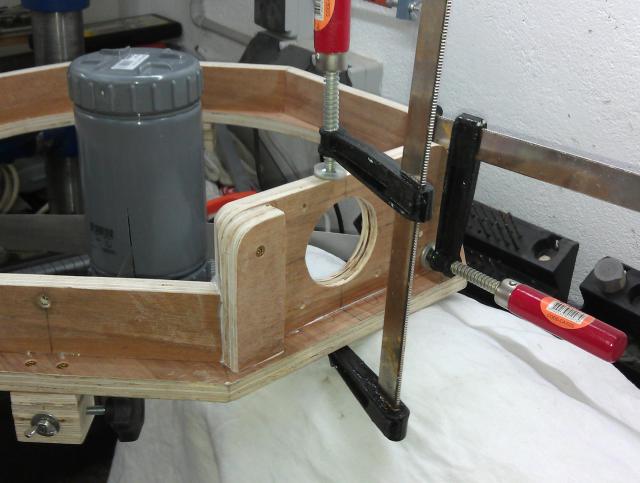
Building the secondary ring
The cutting is done with a jigsaw, and corrected with a Dremel for the internal ring. I included an integrated handle, which is used both for transportation (the secondary cage is stored inside the rocker and makes one of the 2 packages for the telescope) and for telescope manipulation during observing. The octogon is build with a 50 mm height. The optical axis will be
exactly at the level of the octogonal base (facilitating the optical
axis alignment with the focuser, using a laser).
The focuser support is made of 15 mm plywood, as the rest of the
structure. It is reinforced it with a pair of "legs" to ensure maximum rigidity. Even with a 1 kg eyepiece I didn't notice
any bending so far. The focuser itself was an "Event Horizon" piece from JMI, which I eventually replaced with a "Feather Touch" piece from Starligt instruments, which is so much better.
The telescope spider is partly inspired from the work of Serge Bertorello, retaining the "rotating" mirror base, that allows to align the secondary with the focuser optical axis. I also retained the spring
loaded mechanism, which gives a smooth & precise setting of collimation bolts, then allow to "lock" the secondary mirror in position. For the remaining, I customized the structure to have a reduced cell
diameter and a symmetrical spider architecture (I am not found of "offset" spider vanes). The square supports are machined and positionned to receive vanes straight in line. The vanes are in stainless sheet - 0,5 mm thick, and are loaded with a wingnut & bolt system.
Mirror is directly hold on a wooden support using silicone joint. Having done the support twice, I can say that silicone holds the mirror pretty well ! no worries about that. The mirror has a 4,5 mm rear offset, allowing a more homogeneous light collection from the primary cone of light. Collimation is achieved using aluminum oversized knurled knobs, making the secondary properly aligned (both rotation & translation) to the focuser and primary mirror. The result is lean & clean. I had difficulties cutting the vanes, resulting into an offset in mirror position, so I had to make taller supports (about 10 mm more) using plywood blocks. The set remains very stiff after all (luckily enough, the wood screw + wood glue combination gives tremendous strength ;-) ).
 Secondary ring with integrated handle Secondary ring with integrated handle
 Octogonal wooden reinforcement Octogonal wooden reinforcement
 Adding extra reinforcement for focuser rigidity Adding extra reinforcement for focuser rigidity
 JMI focuser JMI focuser
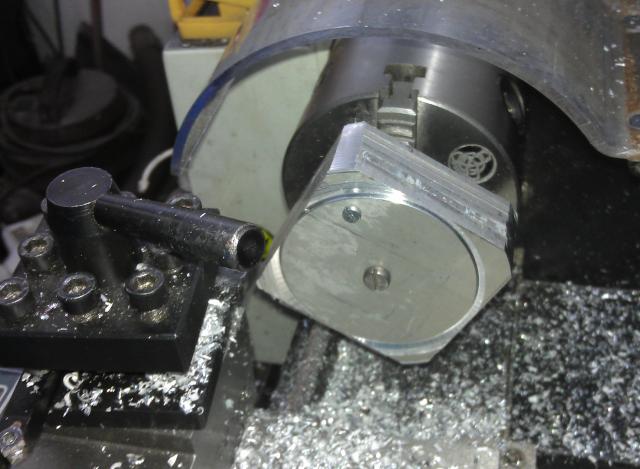 Machining spider body baseplates Machining spider body baseplates
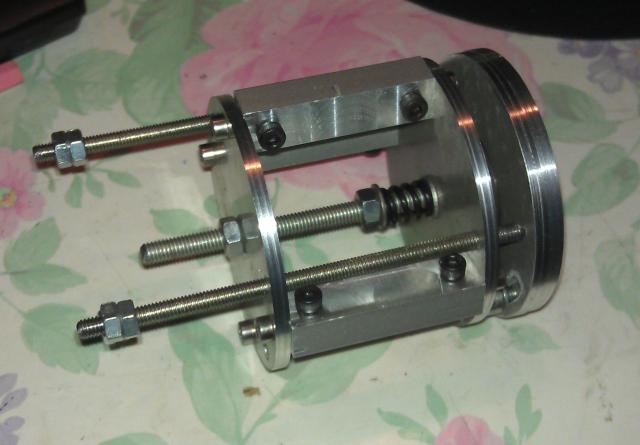 Spider body finished Spider body finished Spider mounted Spider mounted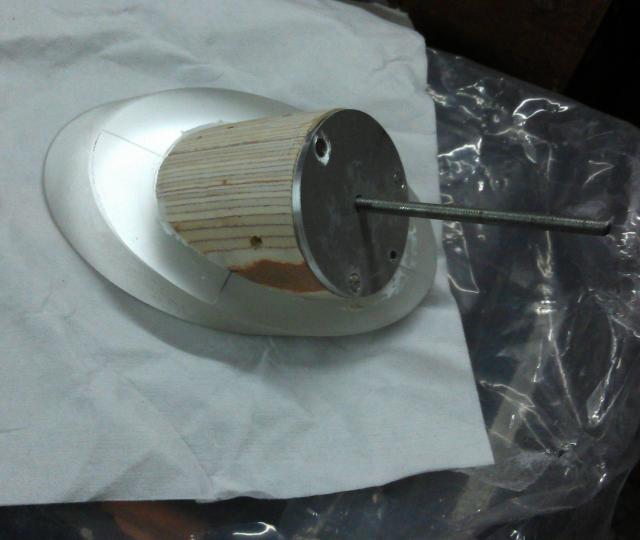 Secondary mirror support Secondary mirror support
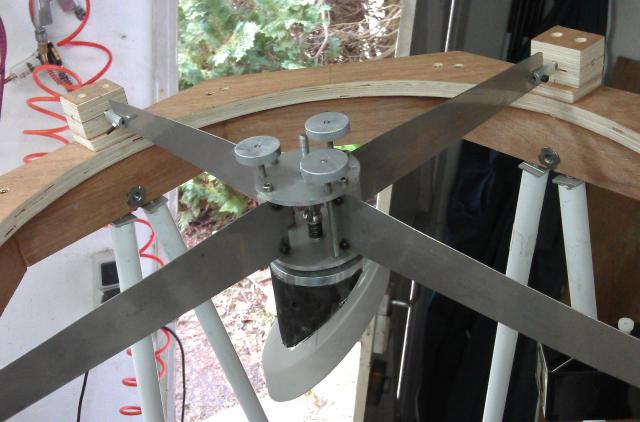 Secondary mirror in place Secondary mirror in place
Fixing the secondary cage on truss tubes
For the secondary ring binding, I retained the simple and elegant design presented on this site. It allows to bind the tubes in pairs, and greatly simplifies the mounting. The idea is to screw the tubes on aluminum angle parts, that will simply be attached to the sides of the secondary octogonal cage. The angles are put in place, then drilled so that the hole is aligned with the proper truss tube angle (8° after refining truss tube length). Finally, the secondary cage is quickly mounted with 4 knobs, and gets very rigid after tightening.
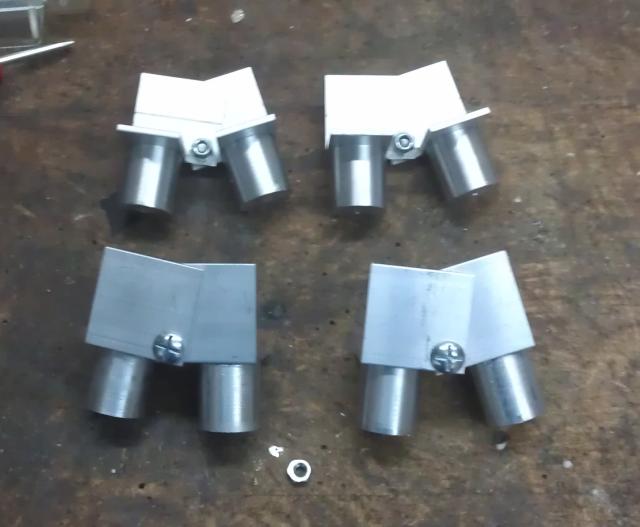 Manufacturing tube bindings Manufacturing tube bindings
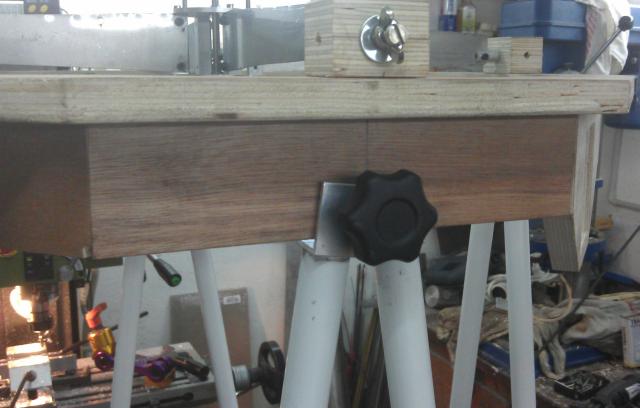 Bindings are tighten with knobs Bindings are tighten with knobs
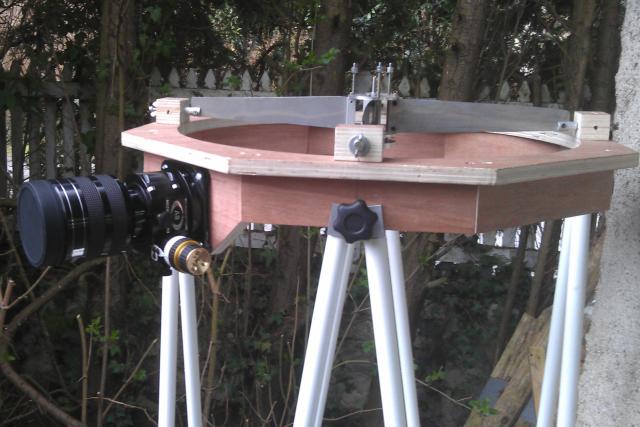 Secondary cage is finished Secondary cage is finished
Next : making the rocker & base
retour en haut | retour à l'accueil
|
